To create a company location, you will start by navigating to the Company Setup (1) tab on the left hand of your screen, and select the drop-down option to show all of the options. Select the Location (2) option to be directed to the location page for your company.
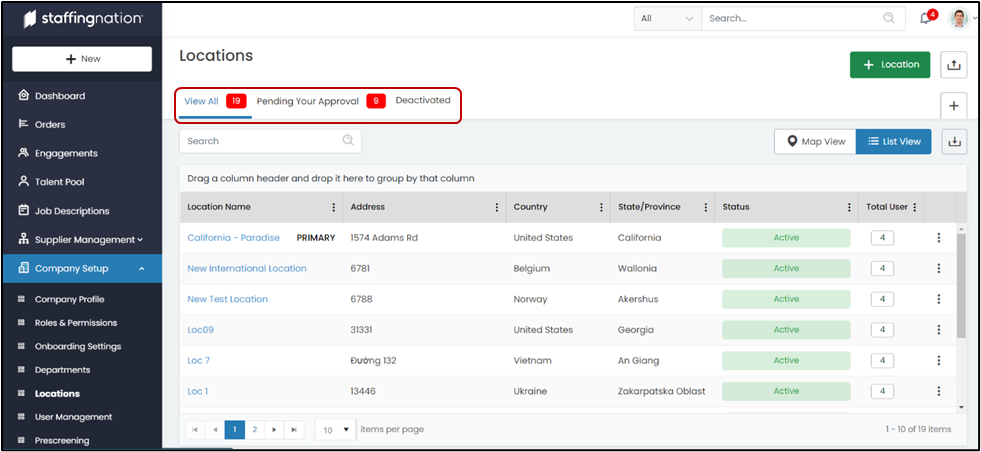
Once you make it to the Locations page, you will see the full list of company locations. The first thing to be aware of is the tabs at the top of the screen that allows you to navigate to various areas within the Locations page. You can view All, Locations Pending Approval, and Deactivated Locations.
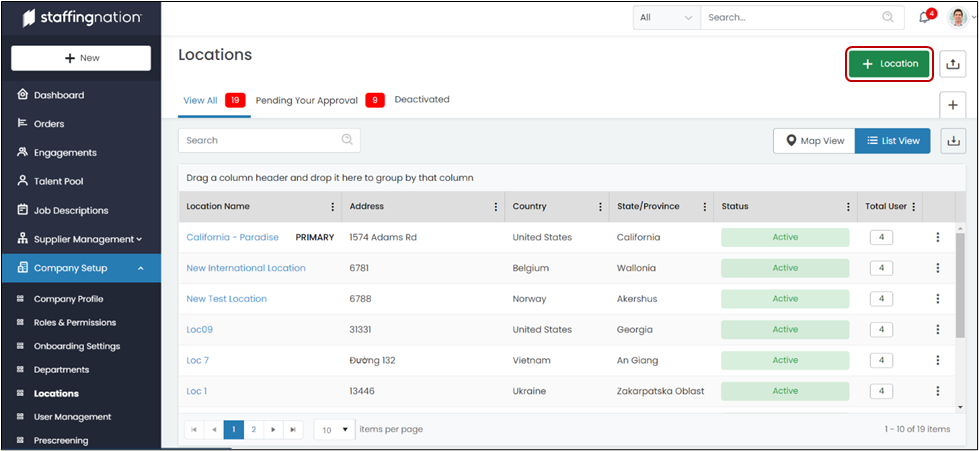
When you are ready to add a new location, simply click the “+ Location” button in the top right-hand corner
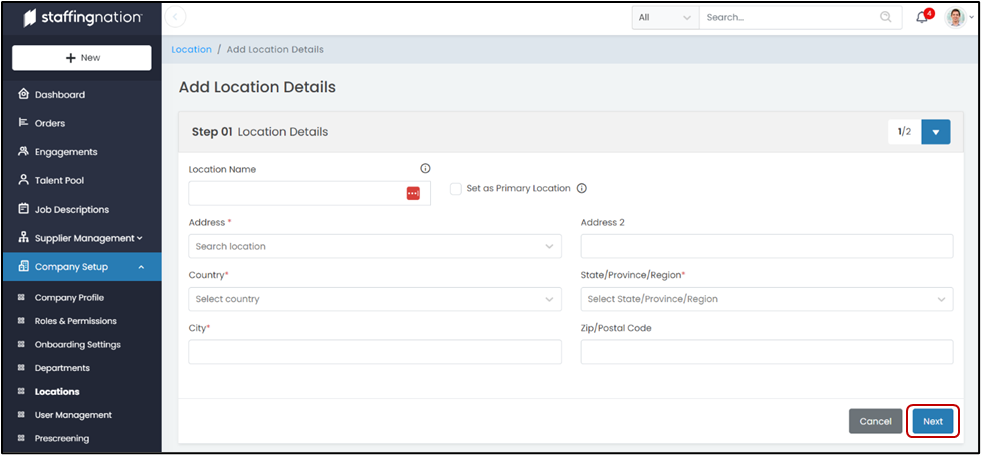
This will lead you to the page where you can add your location details. Simply fill out the fields below and select “Next.”
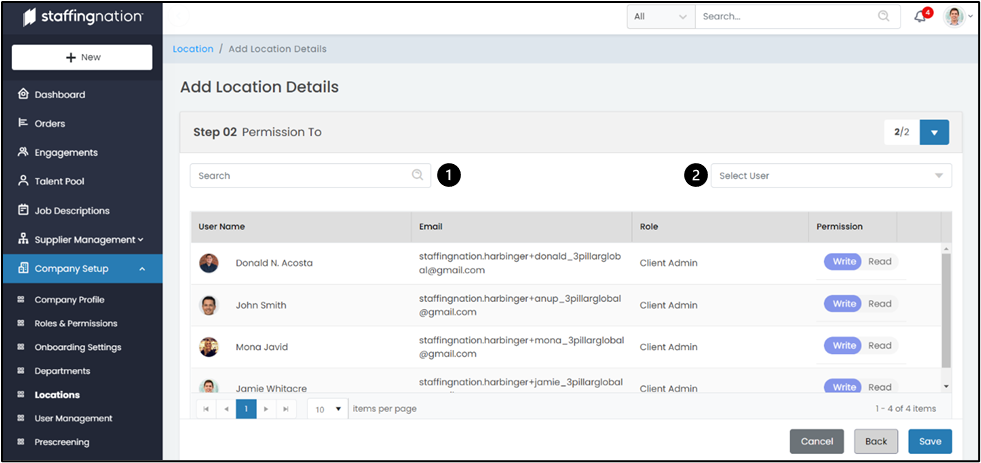
The next step allows you to add Users to the location you just made. This feature will ensure that only those that have the ability to interact with certain locations can attribute orders to these locations. You can even allow someone to have “Read” access so they have visibility into a location but cannot attribute orders to that specific location.
You can search for a user (1) or you can select a user from the drop-down menu (2). Once you have added the users, you can click “Save” in the bottom right corner and you have completed creating a location.